With weebly 4 we have new design elements like sections, section layouts and customizable header layouts which gives the functionality to build even more attractive and professional weebly websites. With these new design elements we can add video backgrounds (Pro Members only), parallax sections, team sections, menu sections, call out sections, image headers, video headers and many other pre-built customizable layouts. In this post we will discuss how to add sections and customizable header layouts to older weebly themes. Weebly explains:
- Sections: Transform your site with stackable, independent sections you can use to create entirely new designs, including parallax and reveal effects. This feature is free and available for all plans, just drag on the section element from the sidebar
- Section Layouts: A variety of new professionally designed, pre-built layouts for your website.
- Customizable Headers: Drag elements into your page headers and dynamically resize the header field to create one-of-a-kind pages. Free with all plans.
- Video Backgrounds: Integrate videos directly into your page layouts to create stunning site designs that will impress visitors and customers. Choose videos from our free video library or upload your own. Video backgrounds are available with Pro Plans and above.
- New Themes: Our theme gallery has been modernized with a wide selection of new themes and pre built templates.
Log in now to access all the latest updates. Please Note: Sections is not available for older, non-responsive themes or custom themes.
As weebly says that these new section elements and customizable header layouts are not available in older themes. So in this blog post we will explain how to make these new section elements integrated in our old / custom weebly themes. Below is the step by step process :
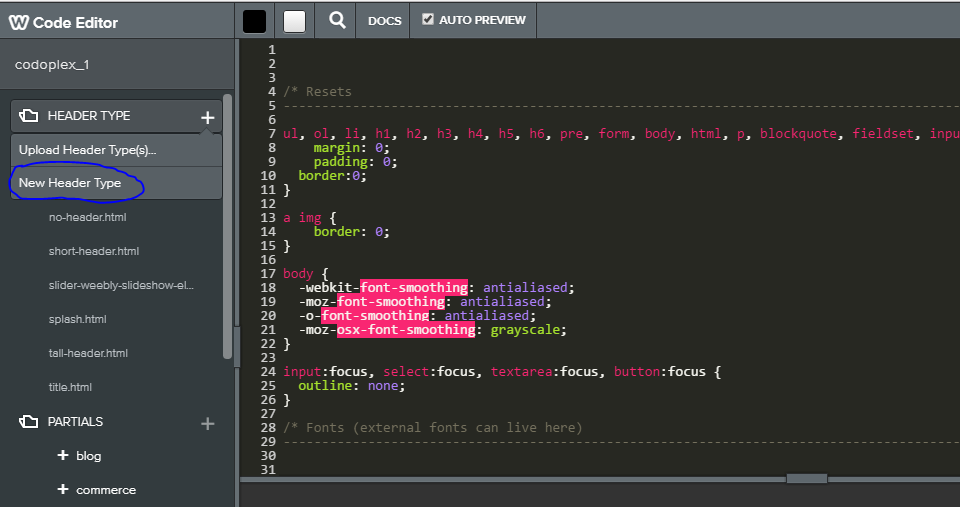
STEP 1 : CREATE A NEW HEADER TYPE
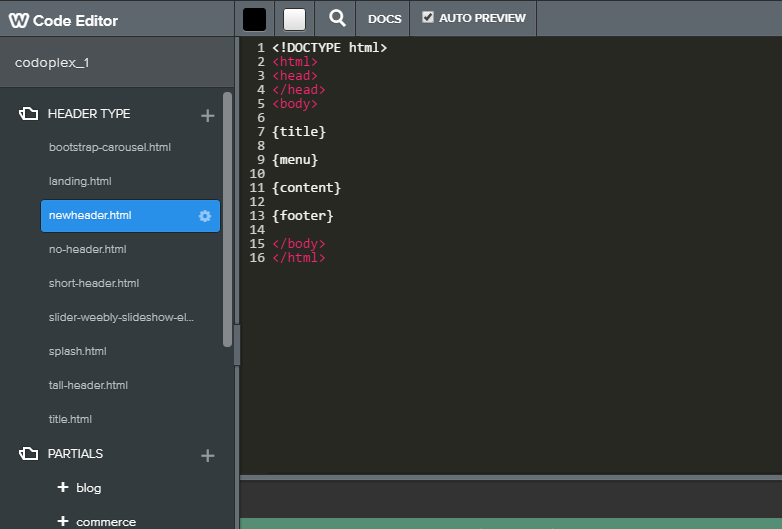
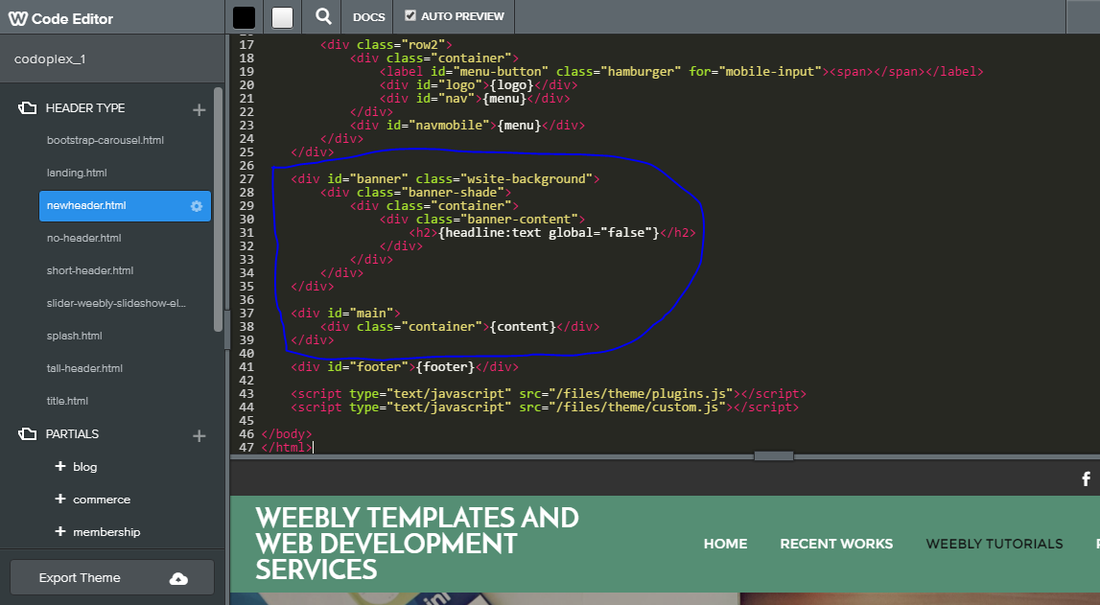
Inside weebly editor go into Theme -> Edit Html / Css -> click plus icon against Header Type and click New Header Type. Rename the newly created header type to whatever name you want, I have renamed it to “newheader”. Now click tall-header.html and copy all code from it and paste it inside newly created Header Type newheader.html (make sure to delete previous code from newheader.html) as shown in below images.
STEP 2 : MODIFY BANNER AND MAIN CONTENT DIV CODES
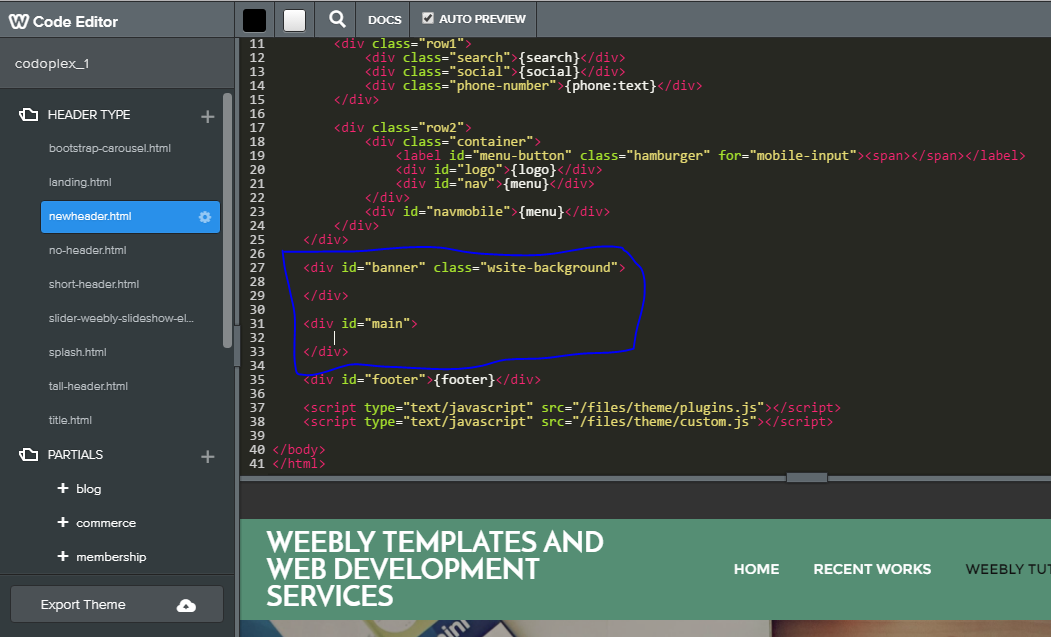
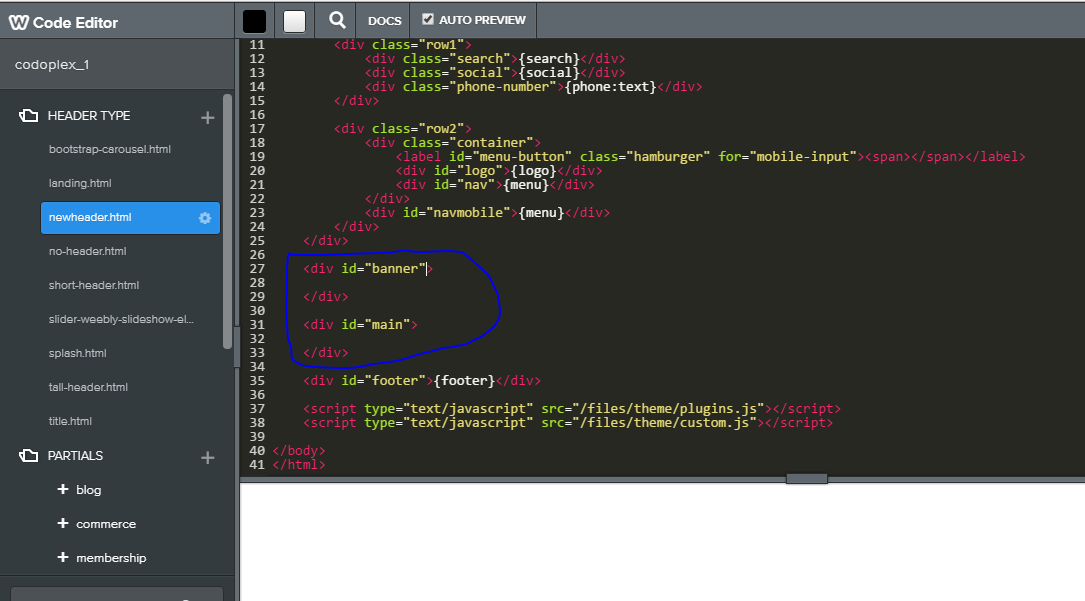
Now inside newheader.html, find the code highlighted in below image (first image). (please note that your theme may use different id’s or classes). In highlighted code you can easily see the 2 div’s one of them is for banner / header and the other one is for main content. Remove the codes inside these 2 div’s as shown in below image (second image). If your banner / header div is using a class “wsite-background” then remove it as shown in below image (third image).
STEP 3 : ADD NEW CODES
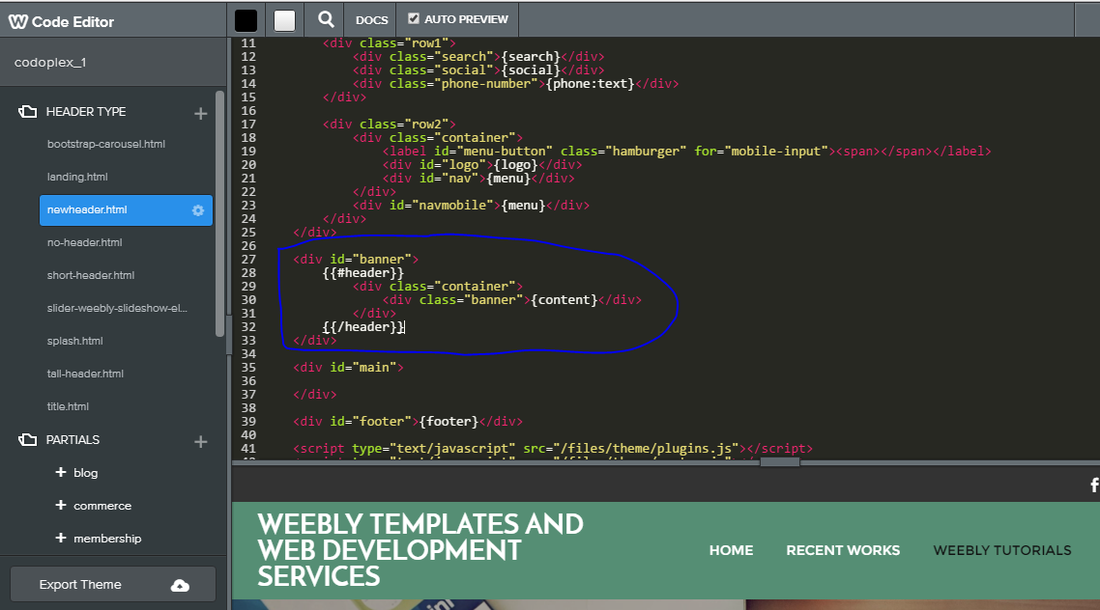
Now add following code in banner / header div:
{{#header}}
<div class=”container”>
<div class=”banner”>{content}</div>
</div>
{{/header}}
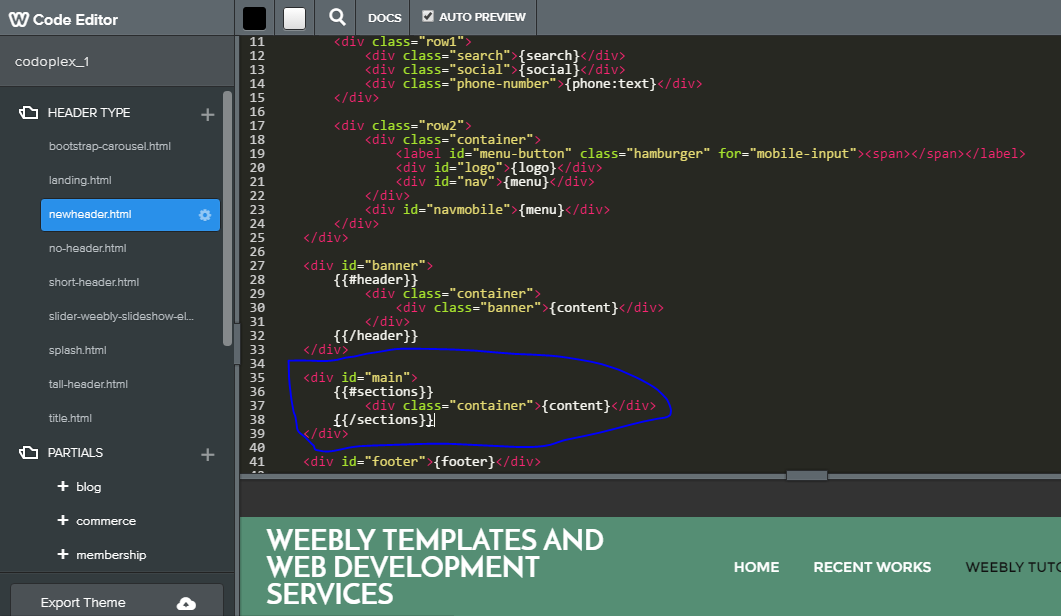
as shown in below image (first image). Add following code in main content div:
{{#sections}}
<div class=”container”>{content}</div>
{{/sections}}
as shown in below image (second image).
STEP 4 : SAVE AND PUBLISH
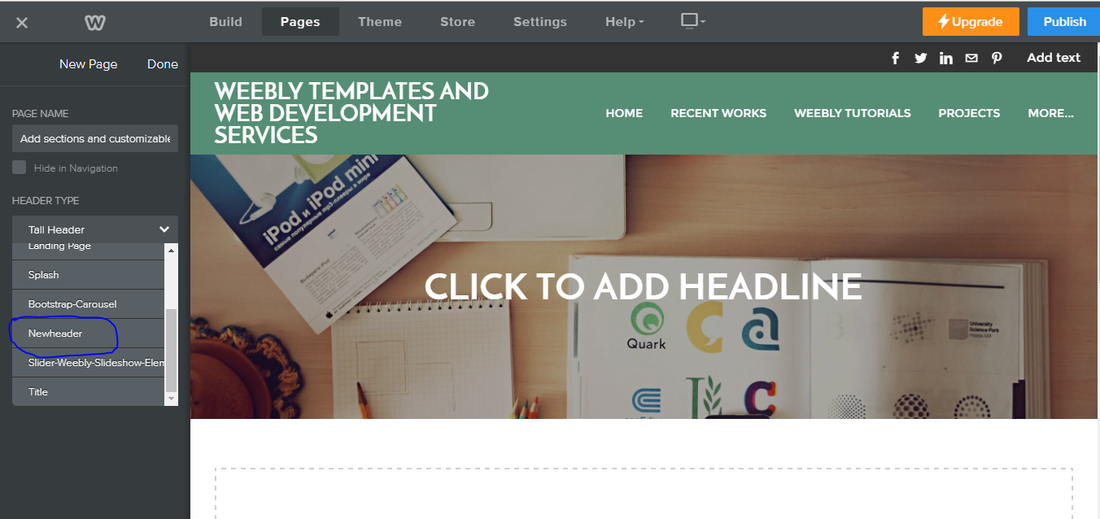
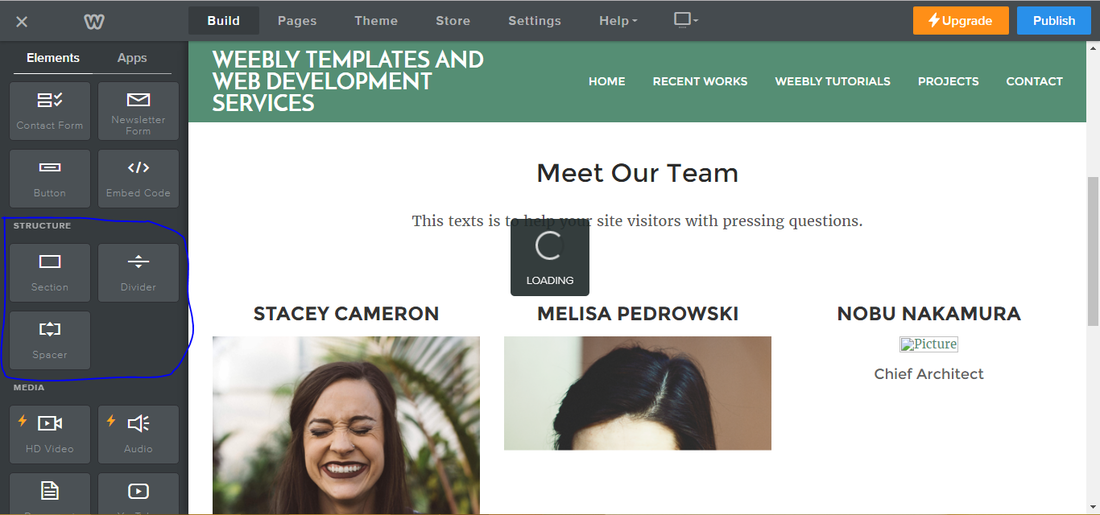
Hit save button. Now go into pages and create new page for testing and name it whatever you want and make sure to change its layout type to newheader or whatever name you entered for new header type as shown in below image (first image). That’s all now you can see the new Header / Banner and sections functionality is integrated. see below images (second and third images).